AI BlogPilot
Installation
- To begin, install and activate the Hub AI Assistant Plugin from your packages manually.
- Next, navigate to WP Dashboard > Hub AI BlogPilot
- Next, navigato to Hub AI BlogPilot > Settings > API Keys. And fill the fields.
- OpenAI API Key: Add the OpenAI API Key to generate texts. You can claim your API key here.
- OpenAI Model: Choose the OpenAI model and enhance its features.
- FAL AI API Key: Add the FAL AI API Key to generate images. You can claim your API key here.
- Unsplash API Key: Add the Unsplash API Key to generate images (optional). You can claim your API key here.
Add New Rule
-
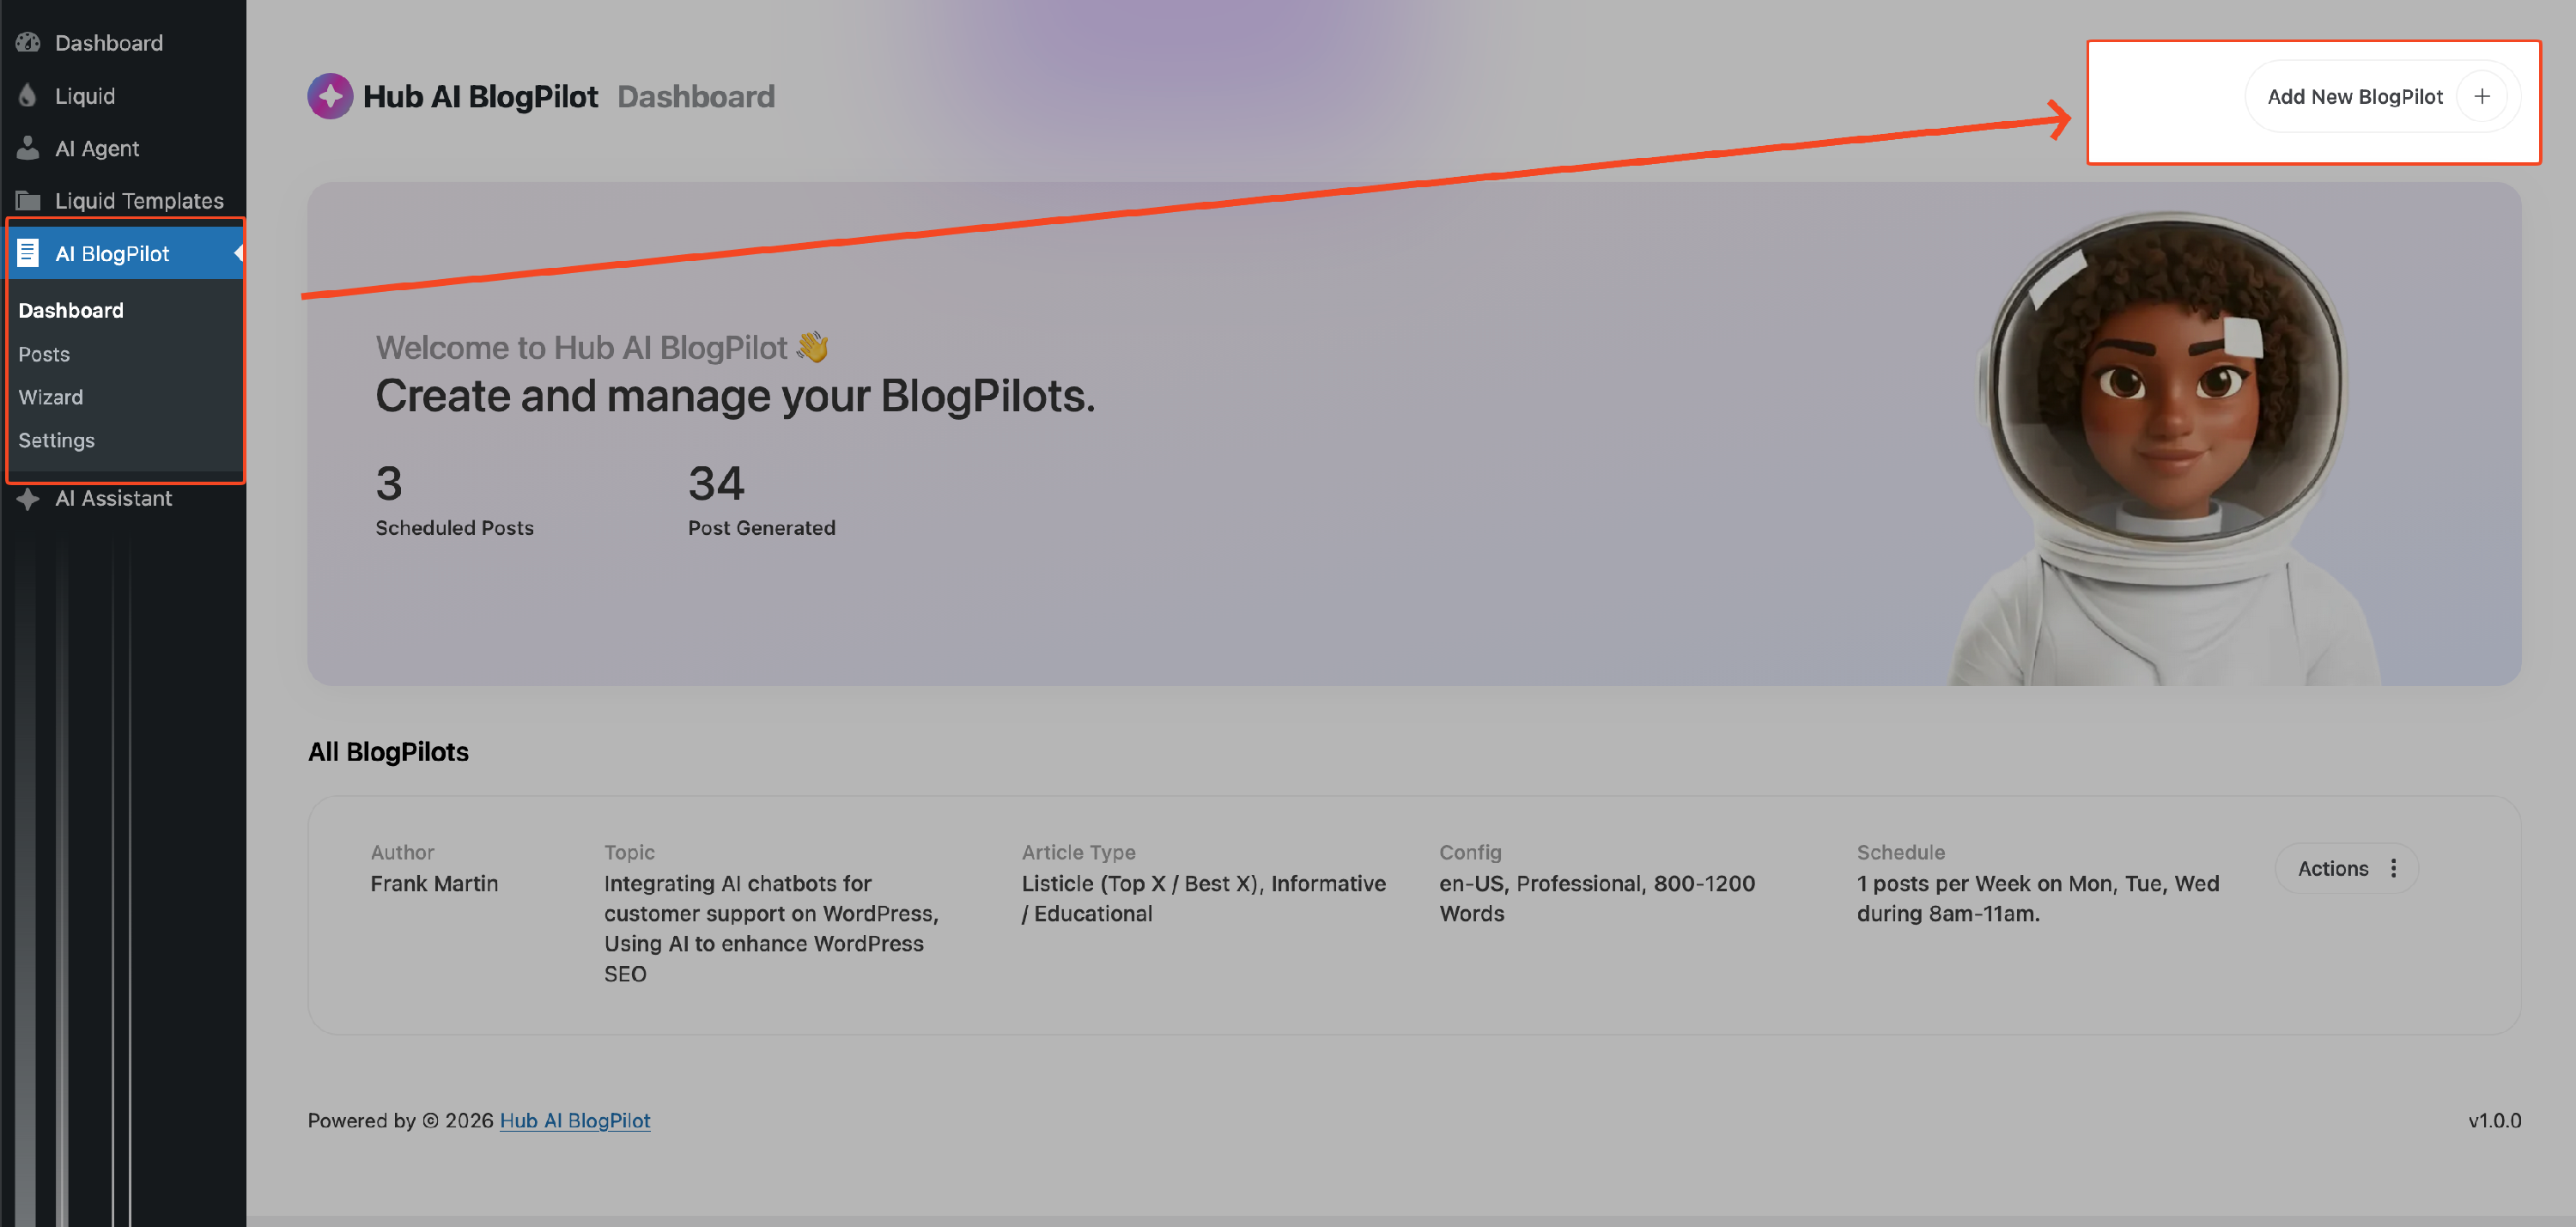
To begin, go to the WP Dashboard > Hub AI BlogPilot > Dashboard and select the Add New BlogPilot button located in the top right corner. Follow the steps to easily create your posts.
-
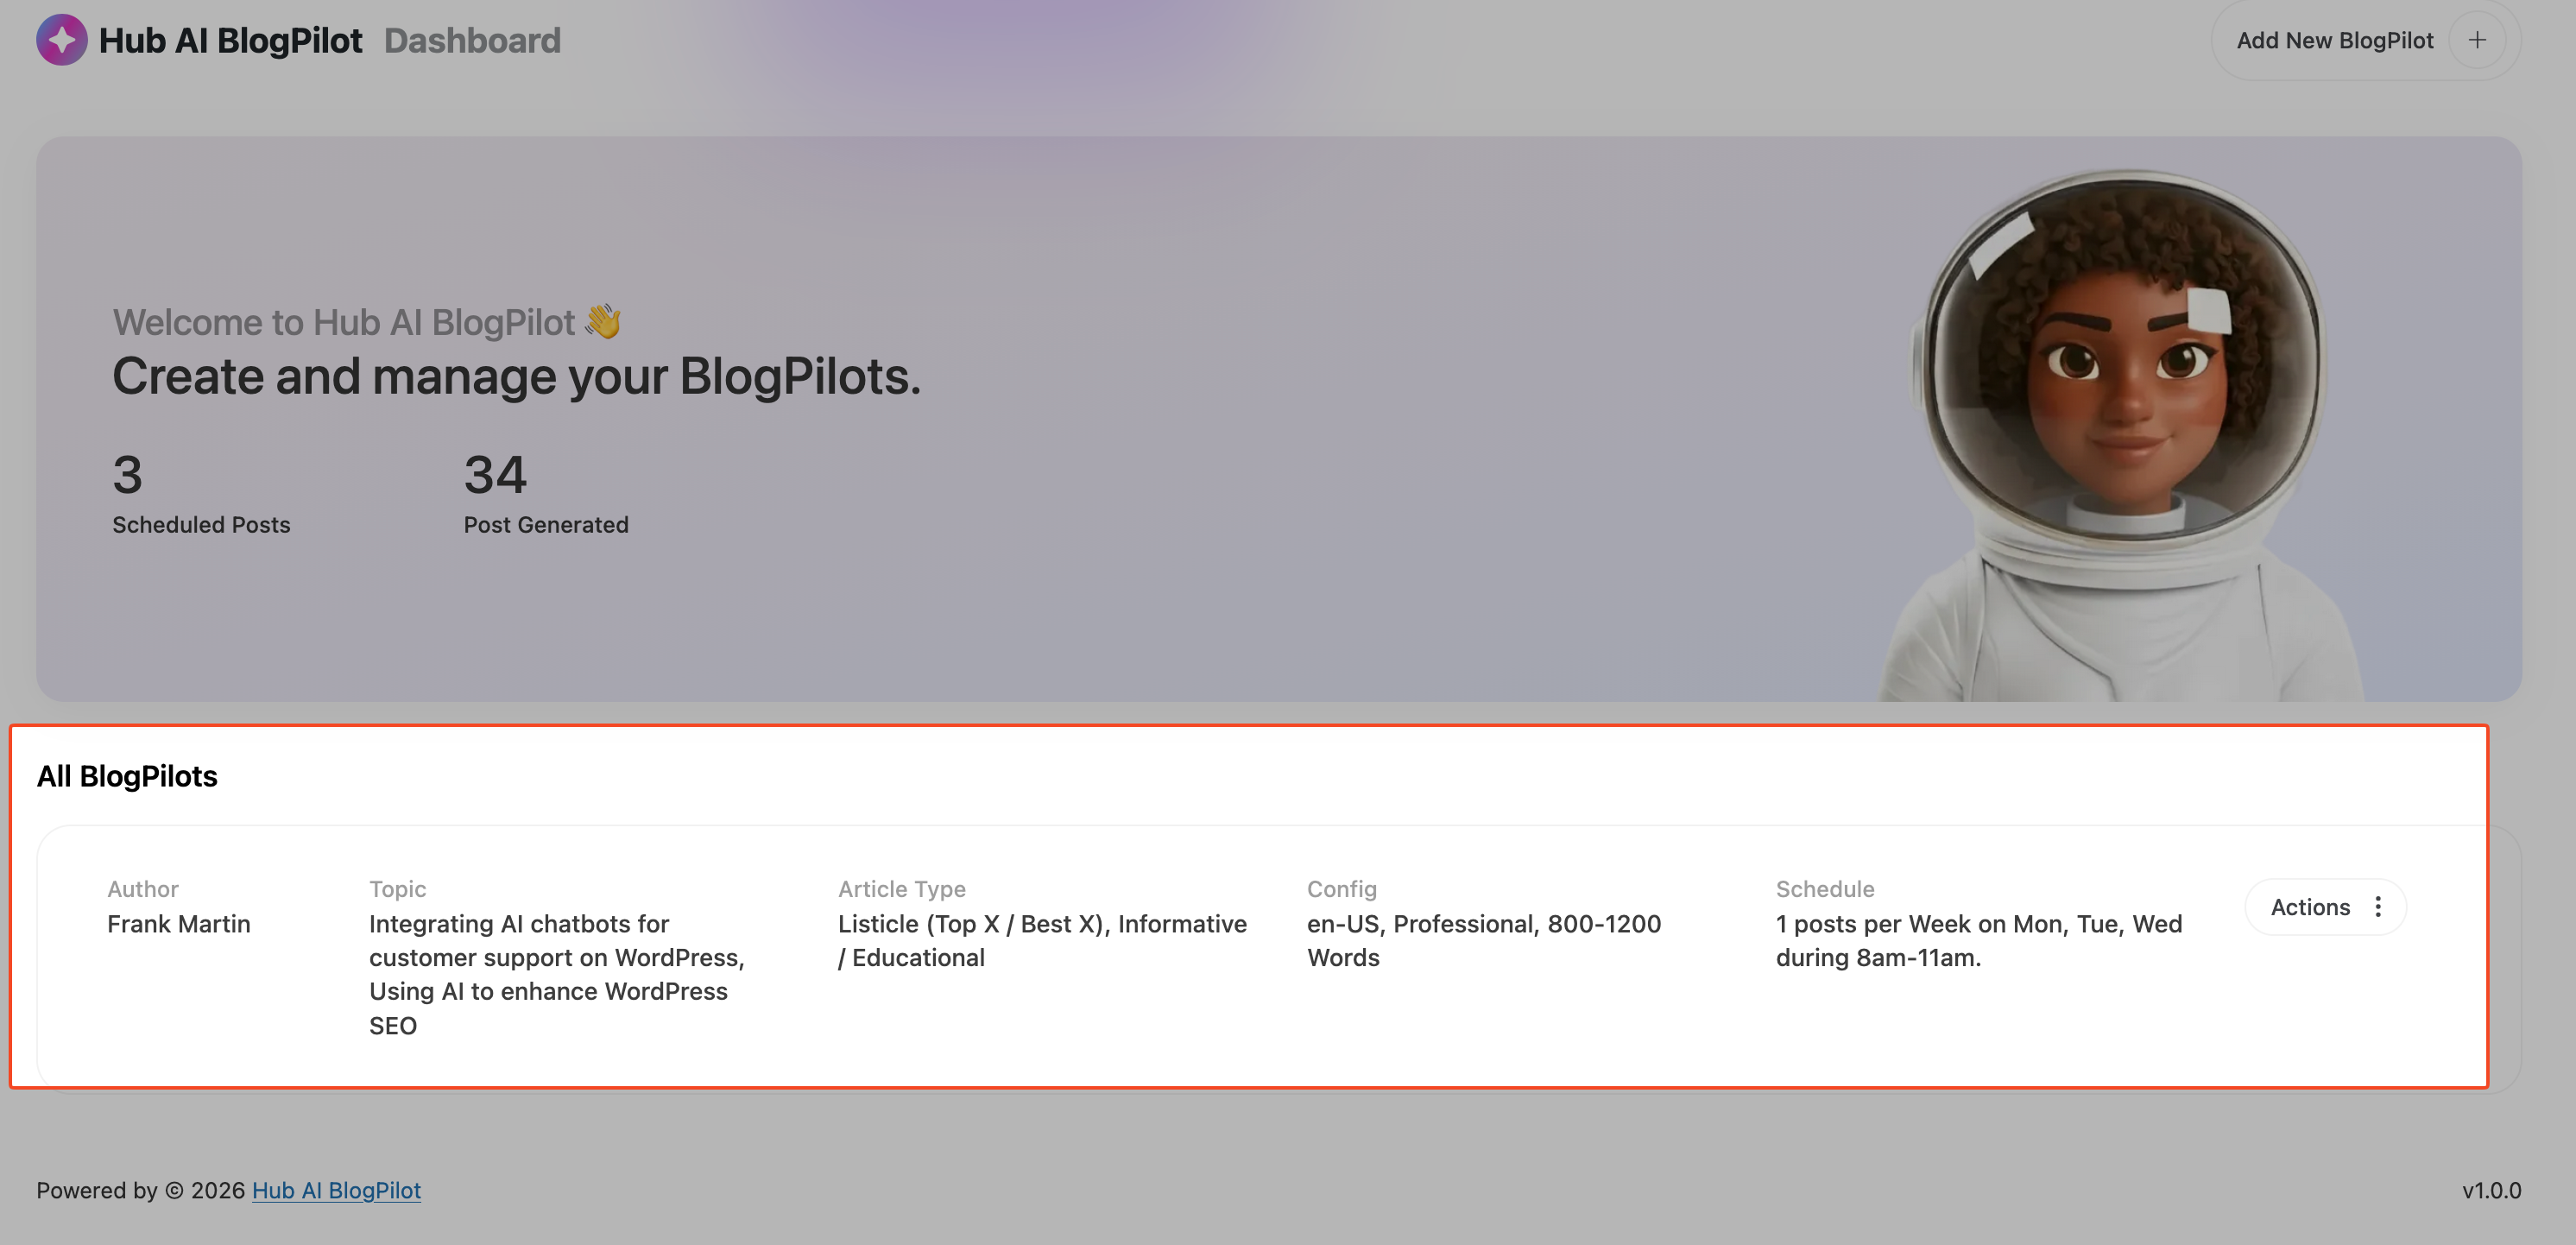
The rules you establish will be displayed on the dashboard.
-
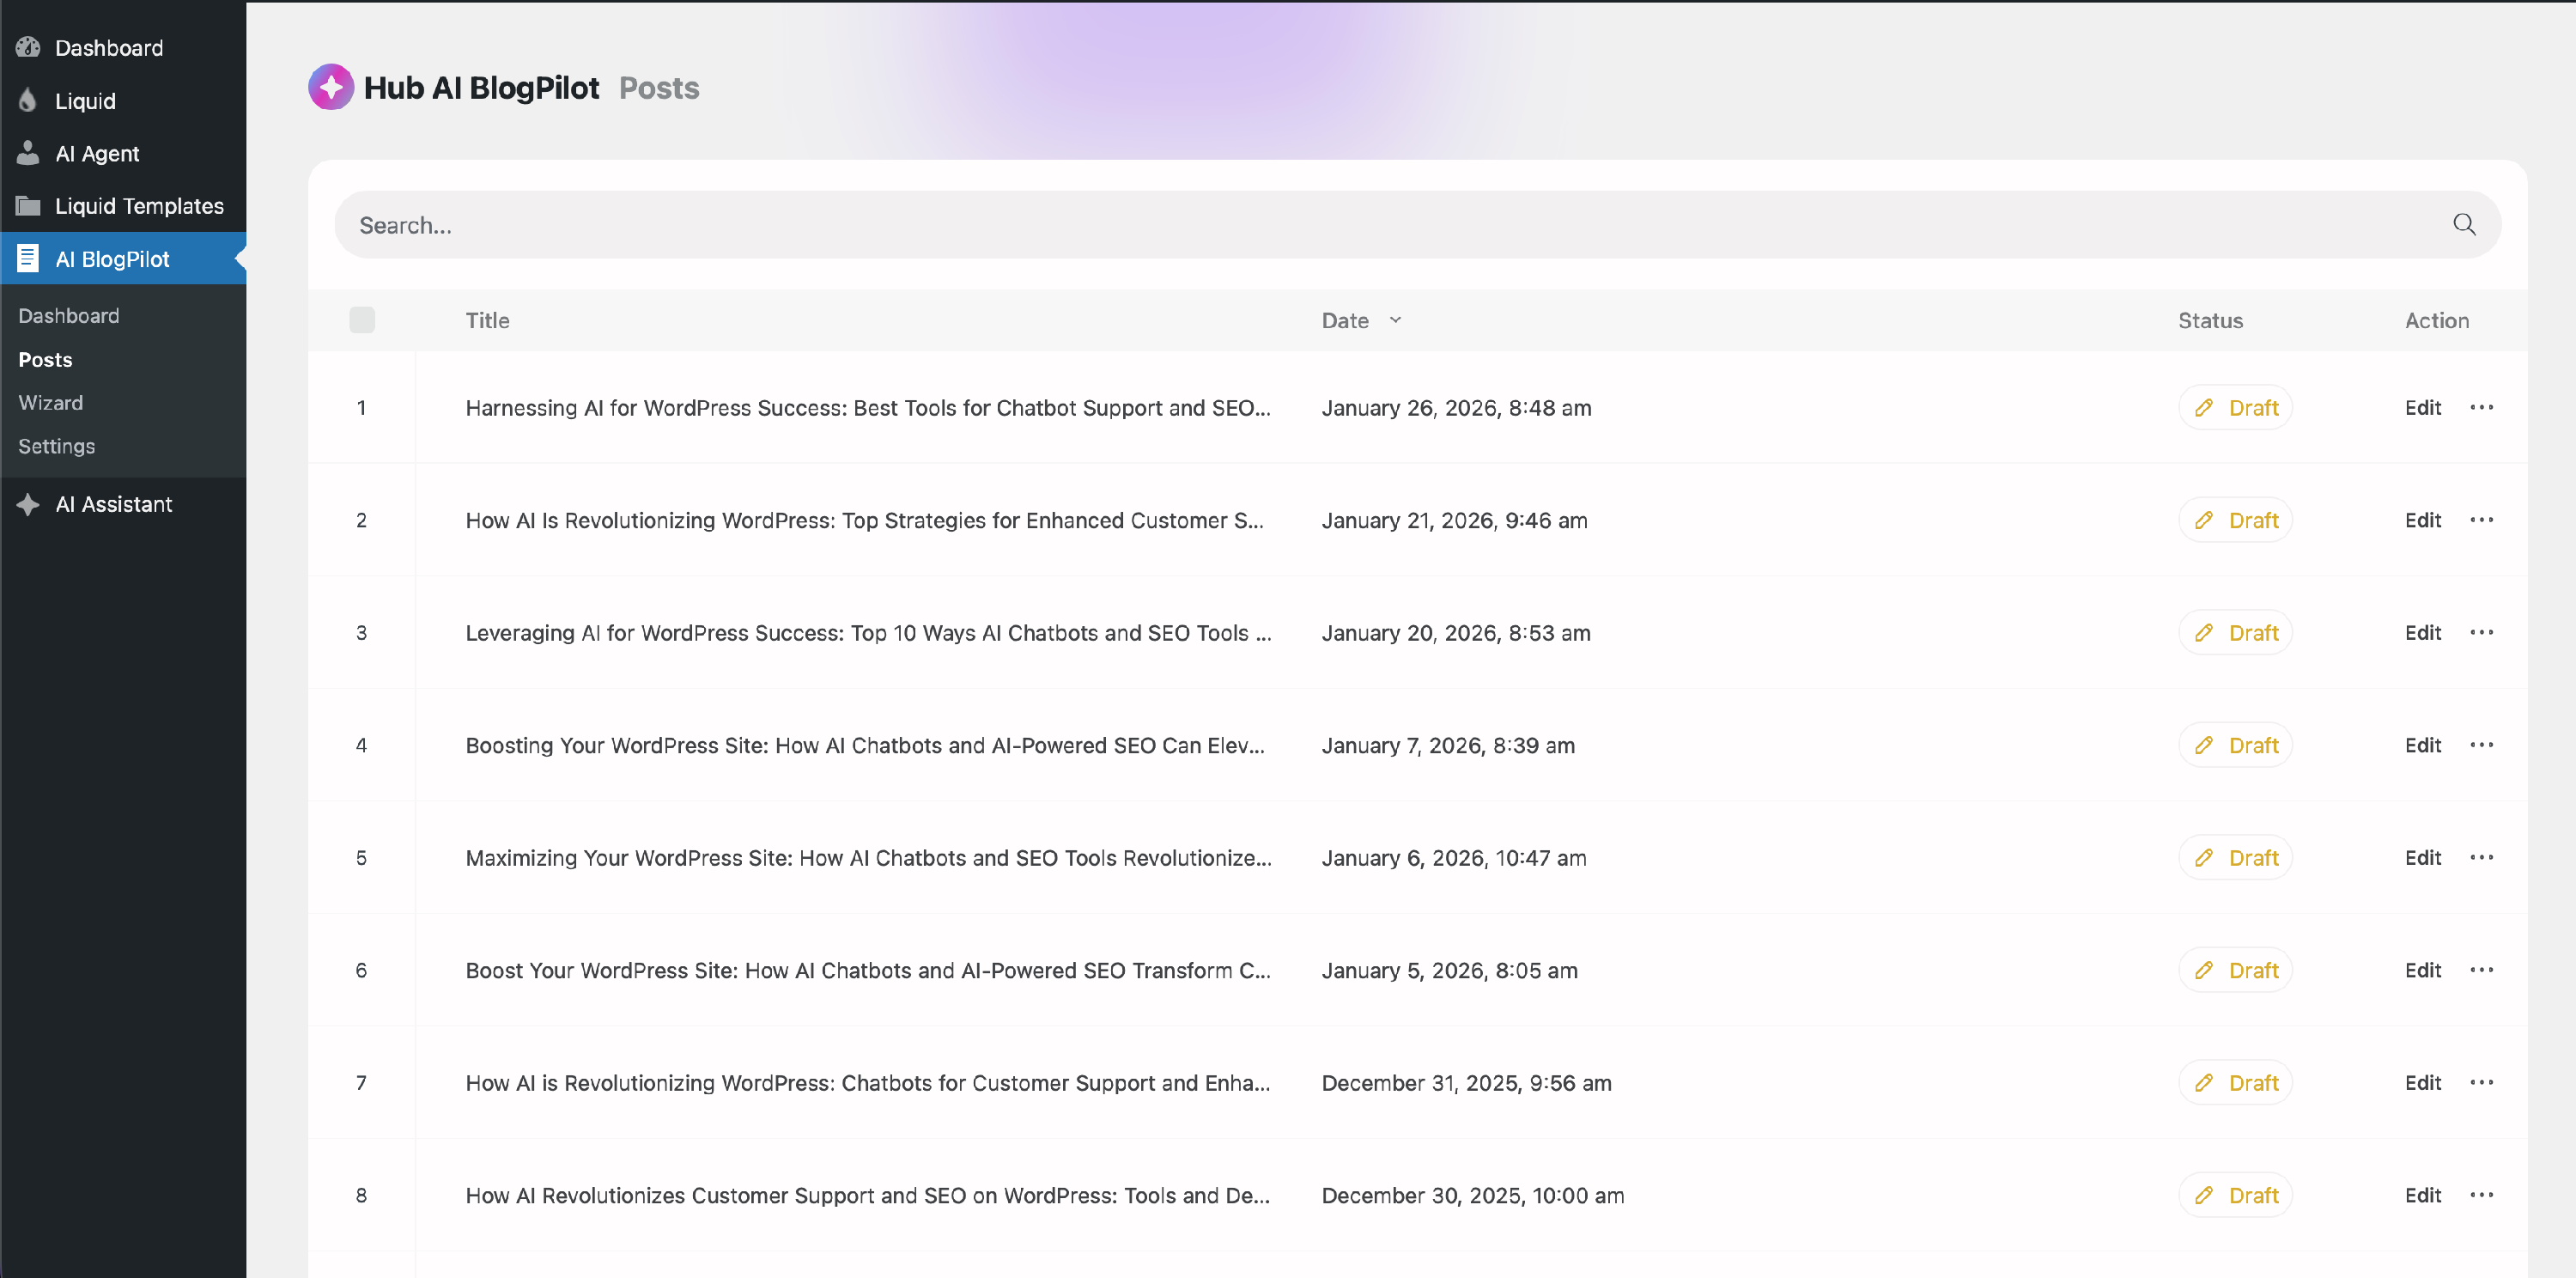
The created post can be viewed in HUB AI BlogPilot > Posts


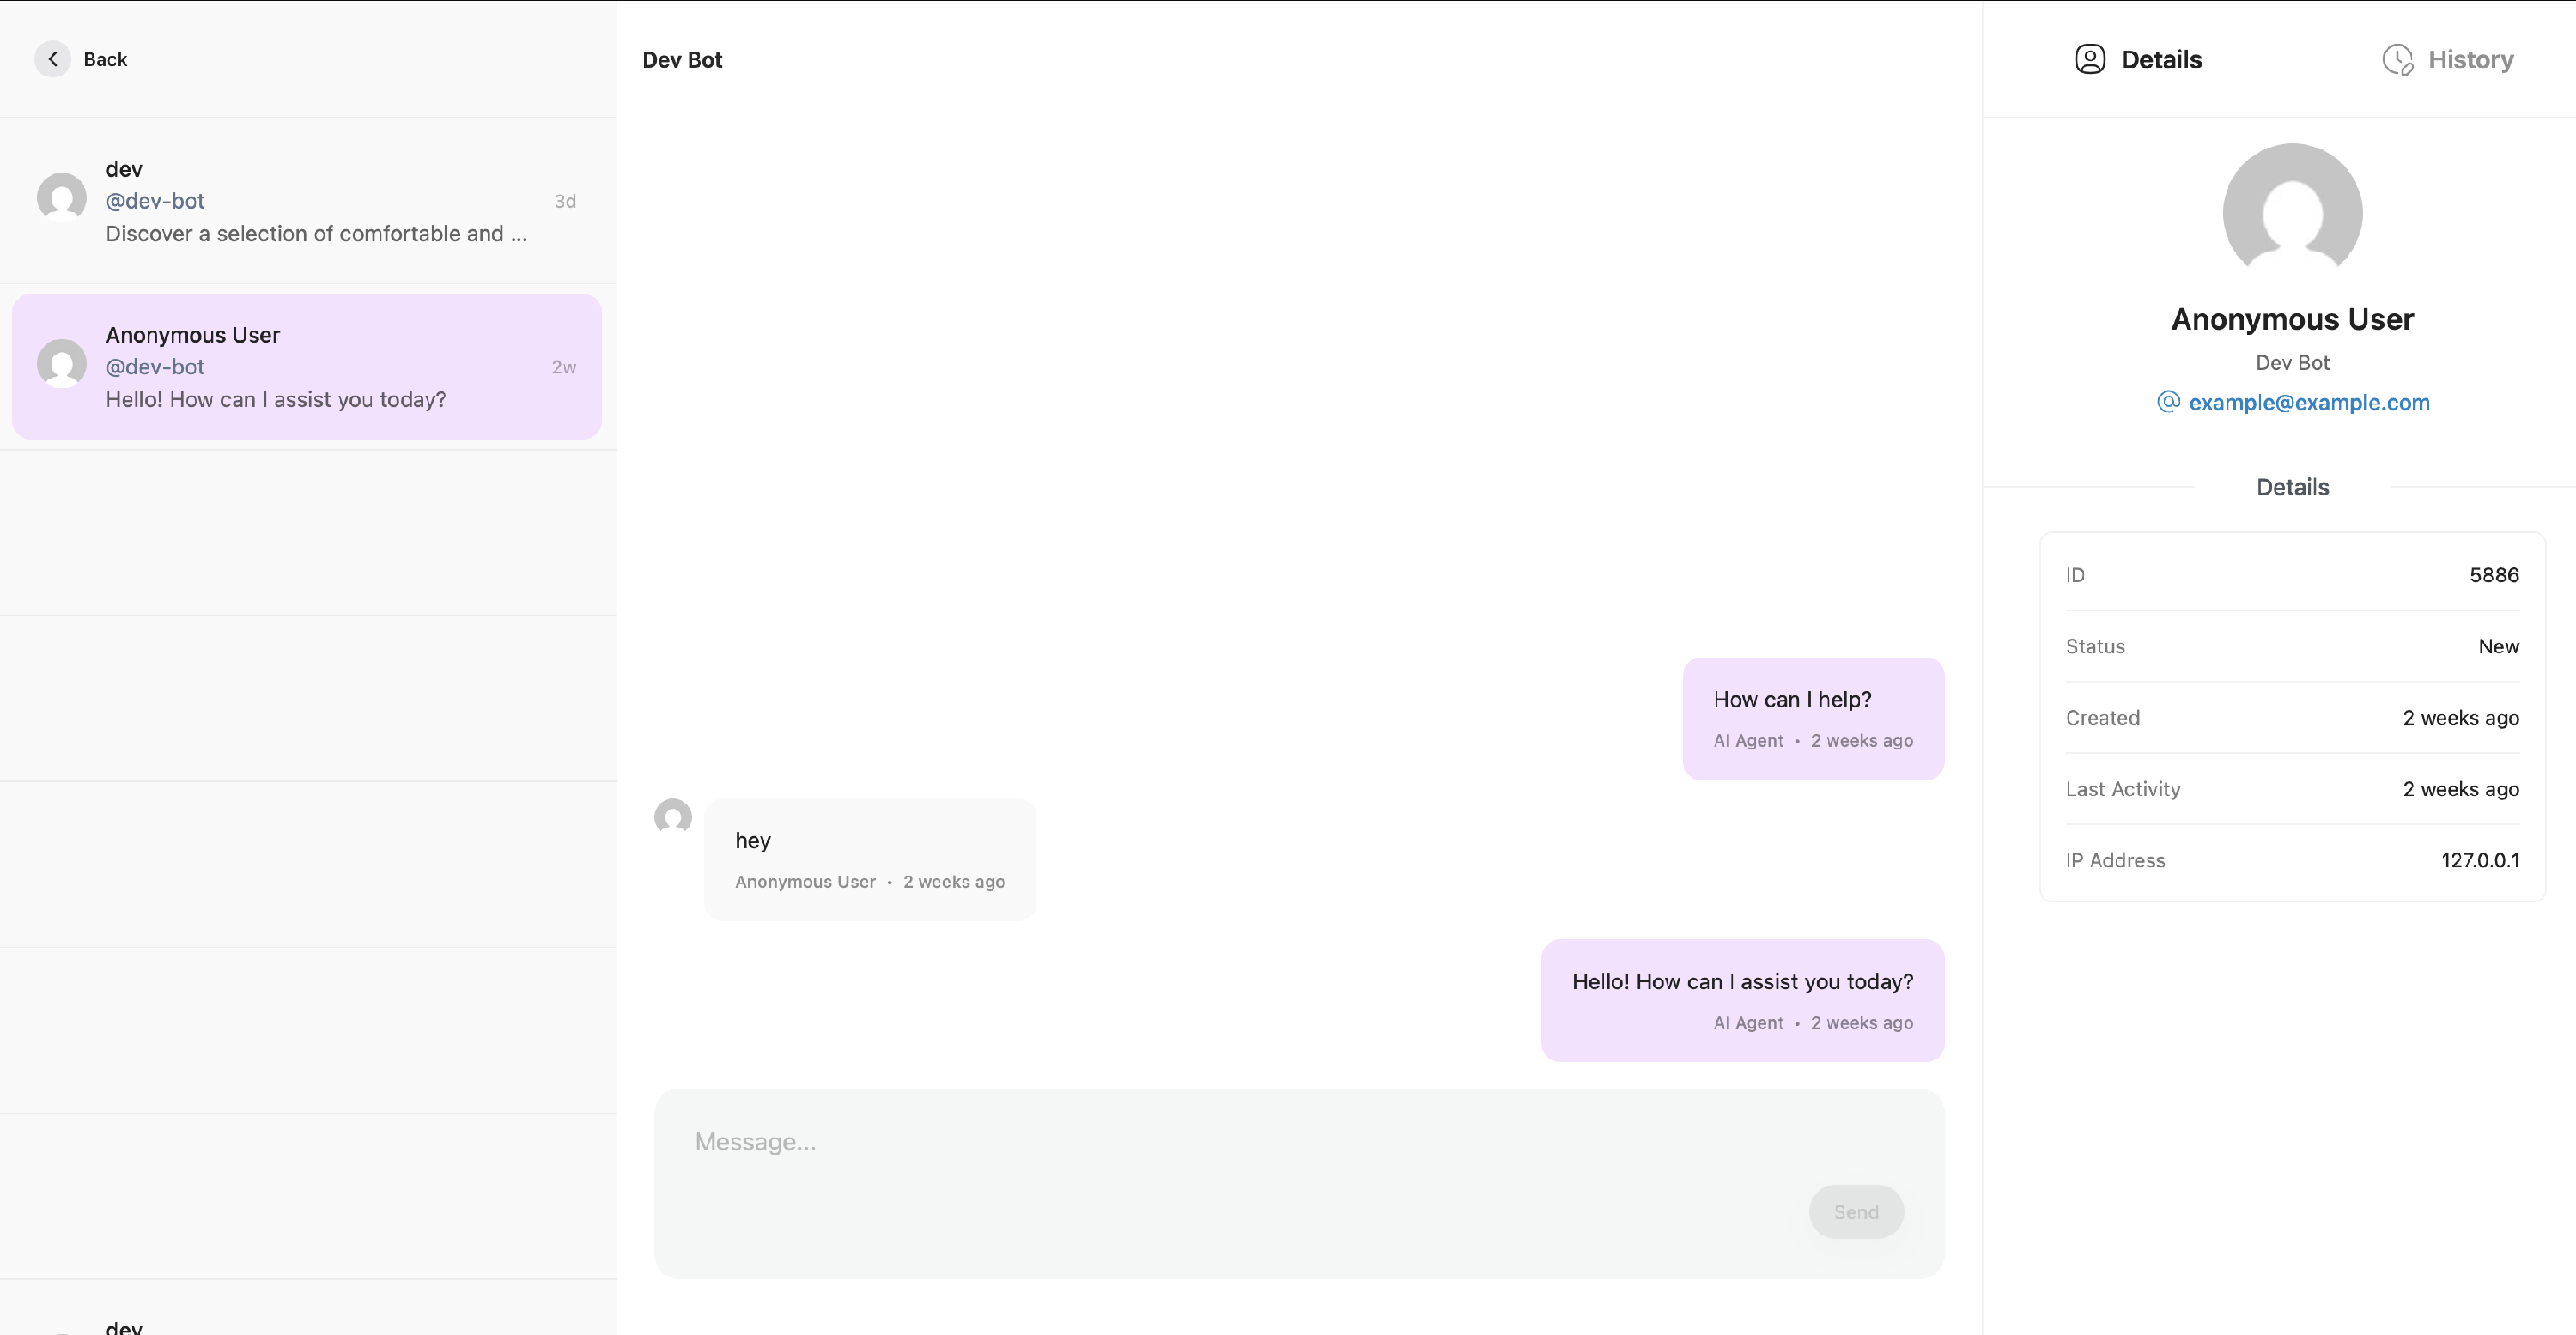
Chat History (Admin Side)
Proceed to the Hub AI Agent > Chats section to access the complete chat history. This feature enables you to engage in real-time conversations, assuming the role of either the customer or a real agent.
Note: The Ably API is required to enable real-time chat functionality. Without it, users will have to manually refresh the page.